Happy Wednesday! It’s Monthly DIY Challenge day, and for those who aren’t familiar with it, I’ll give you the quick scoop on the MDC. On the 2nd Wednesday of each month, we get together with some of our favorite blogging friends to each create a project using the same item or theme. It’s always fun to see how everyone interprets the theme differently.
This month, our challenge item is “scrap wood”, and it can be any type of leftover, reused or repurposed wood. I chose to use leftover planks that have been hanging out in my basement, and an old wood frame from the thrift store.
Some links in this post are affiliate links. For more information, click here.

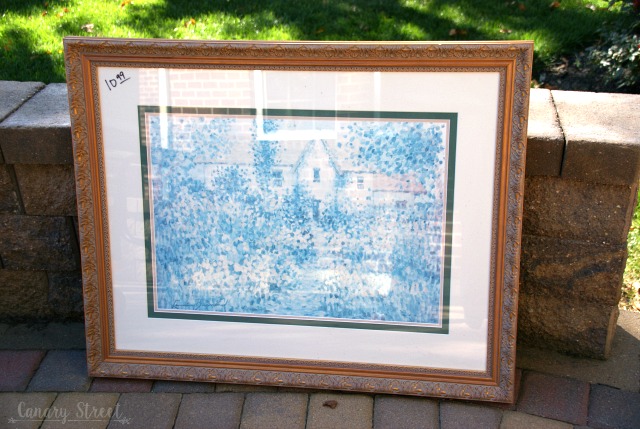
Here’s the thrift store frame I started with:

And these are the wood planks I used.

I started by painting the frame with Annie Sloan chalk paint in “Old White”. I cut the planks to fit the frame (they’re super thin and can be cut with a small hacksaw), then layered a few different colors of paint on them to give a light, weathered gray look. I used Annie Sloan chalk paint Paris Grey, French Linen, and Old White.
I used silicone to attach the planks to the frame. You can read more about how to use silicone for a project like this and see photos here.
To create the wording, I purchased a font called Braveheart, then used it in Microsoft Word. I printed it onto projector paper and transferred the image using an overhead projector. This is the same method I used for my State Silhouette Art. If you need more details on using an overhead projector to paint graphics, check out this post.

The above photo is the overhead projector image. I used a white watercolor pencil to trace the image onto the wood. I have this watercolor pencil set.
To paint the letters in when I was finished, I used an extremely small amount of Annie Sloan’s Old White chalk paint and water. I basically got my brush wet and dabbed the tiniest bit of paint onto it, blotted on a paper plate then painted the letters. The watercolor pencil will dissolve with the water and adds most of the white color, so very little paint is needed in addition to that. I wanted the paint to be thin so it just kind of sunk into the wood and looked a bit weathered. If you need an inexpensive set of brushes to get started, I have this set and really like it.
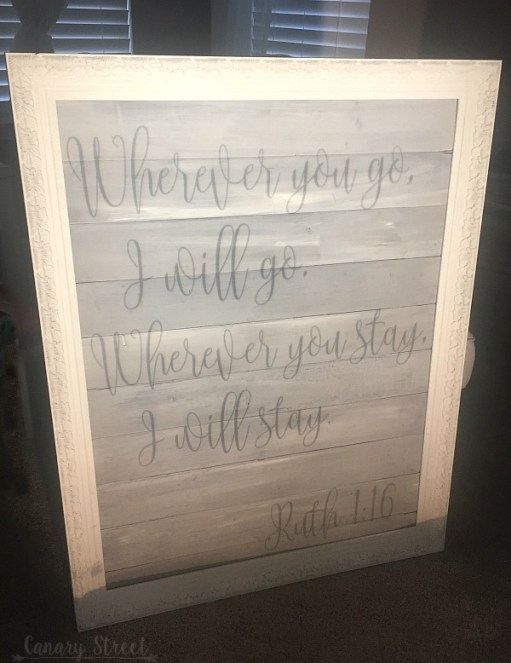
I really love paint projects like this. I find the detail work to be so relaxing. If you enjoy adult coloring books, I think it would be really similar. From start to finish (tracing out the image and painting it in) it took me about two hours. Here’s what it looked like when I was done.


Ready to see the rest of the MDC projects? Check them out below, and if you’d like to see the full tutorial for any project just click the picture. Hope you enjoy the rest of your week!

Want to hang out more? We do too! You can find us here: Pinterest, Facebook, Twitter, Instagram, & Google+.
Looking for more? You may also enjoy our Annie Sloan Chalk Paint Tips.


One of my favorite Bible verses 🙂 What a beautiful sign, Amy! Love the rustic farmhouse feel
Love that verse! The frame is gorgeous, the font is perfect and love the wood planks! Such a pretty project, Amy!!
This is SO perfect, Amy. I really love it! I kind of want to make some up for Christmas gifts now! Thanks for the great idea.
You forever amaze me with your creativity, Amy, no playing this doesn’t even look like the same piece. As always fabulous job and I love love love the script you chose too. it’s beautiful. Hugs, CoCo